
Understanding Wood Floor Sanding
Wood floor sanding is a key step in restoring and maintaining the beauty of hardwood floors. This process involves removing the top layers of wood to eliminate imperfections, scratches, and wear, leaving a smooth surface ready for refinishing. Proper sanding is crucial for achieving a flawless finish and enhancing the longevity of the wood.
What is Wood Floor Sanding?
Wood floor sanding is the mechanical process of stripping the top layer of wood from your floors. The goal is to expose fresh wood, remove any old stains or finishes, and prepare the floor for refinishing. It’s essential in any floor restoration project, as it allows new finishes or stains to bond correctly with the wood.
Benefits of Sanding Wood Floors
Sanding wood floors offers several benefits, including:
- Smooth Surface: Removes imperfections, scratches, and old finishes.
- Improved Aesthetics: Restores the natural beauty of the wood, making it look new again.
- Better Durability: Prepares the floor for protective finishes, prolonging its lifespan.
- Increased Property Value: Well-maintained hardwood floors can increase a home's resale value.
When Should You Sand Your Floors?
You should sand your wood floors when:
- The surface is dull or scratched.
- There are deep stains that refinishing alone cannot cover.
- You want to change the stain or finish color.
Essential Tools for Wood Floor Sanding
Sanding wood floors requires specialized tools to ensure even results and to minimize damage to the floor. While DIY kits are available, professional equipment often delivers better results.
Types of Sanding Machines
Belt Sanders
Belt sanders are powerful machines ideal for large areas. They use a continuous belt of sandpaper, making them effective for heavy-duty sanding on floors with deep scratches or uneven surfaces.
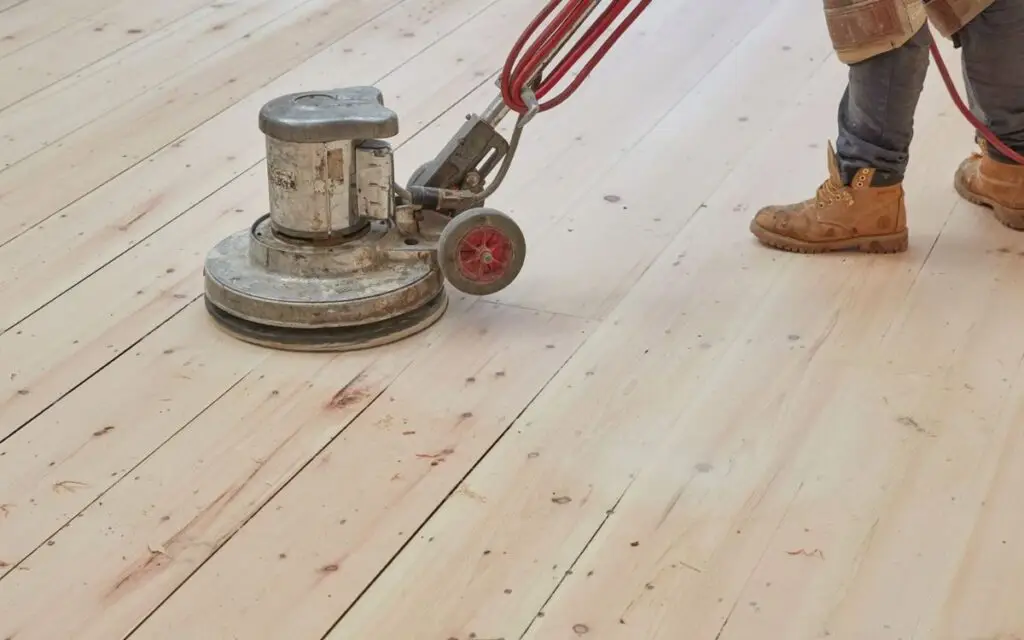
Orbital Sanders
Orbital sanders are less aggressive than belt sanders and are perfect for final smoothing. They work by moving in circular motions and are often used for finishing touches after rough sanding with a belt sander.
Sandpaper Grit Selection
Choosing the right grit is essential for effective sanding:
- Coarse (36-40 grit): Removes old finishes and deep scratches.
- Medium (60-80 grit): Smooths out the surface and removes minor imperfections.
- Fine (100-120 grit): Prepares the floor for finishing, creating a smooth surface.
Dustless Sanding Equipment
Dustless sanding machines are designed to minimize dust, which can be harmful if inhaled and difficult to clean up. Professionals often use these systems to keep the work area clean and protect nearby furniture and electronics from dust contamination.
Step-by-Step Guide to Sanding Wood Floors
Sanding your wood floors properly involves several steps to ensure a smooth and even surface that’s ready for refinishing.
Step 1: Preparing the Floor Surface
Cleaning and Removing Furniture
Before sanding, ensure the room is cleared of all furniture, rugs, and décor. Any items left in the room could interfere with the process or get damaged by the dust and machinery.
Nail and Staple Removal
Inspect the floor for any nails, staples, or screws that might protrude. These must be removed or hammered down to avoid damaging the sanding machine or creating gouges in the wood.
Step 2: Sanding Techniques
Direction of Sanding
Always sand in the direction of the wood grain to avoid scratches and ensure a smooth finish. Sanding against the grain can lead to unsightly lines that are difficult to remove.
Sanding Edges and Corners
Edges and corners are often tricky to sand with large machines. For these areas, use a hand sander or an edge sander to ensure an even finish throughout the room.
Step 3: Final Sanding and Smoothing
After the initial rough sanding, switch to a finer grit to smooth the surface. This step removes any remaining scratches and prepares the floor for staining or finishing.
Common Mistakes to Avoid During Floor Sanding
Over-Sanding the Floor
Over-sanding can lead to thin floors that are more susceptible to damage. It’s important to sand just enough to remove imperfections without weakening the wood.
Incorrect Sandpaper Grit
Using the wrong sandpaper grit can either fail to remove deep scratches (if too fine) or create additional damage (if too coarse). Follow the proper progression from coarse to fine grit for the best results.
Not Protecting the Room from Dust
Failing to contain the dust generated by sanding can lead to a mess throughout your home. Dust can settle on freshly sanded surfaces, leading to imperfections in the finish. Professionals use dustless sanding systems to keep the work area clean.
The Importance of Floor Refinishing After Sanding
Sanding alone doesn’t protect your wood floors. After sanding, refinishing is essential to seal and protect the newly exposed wood.
Applying Stain or Finish
Once the floor is sanded smooth, you can choose to apply a stain to alter the wood’s color or simply a clear finish to enhance its natural beauty. Stains should be applied evenly to avoid blotchy areas.
Sealing and Protecting the Wood
A protective sealant or polyurethane finish is then applied to safeguard the wood from future wear and tear. This layer is crucial for durability and can range from matte to high-gloss finishes, depending on your preference.
How Long Does Wood Floor Sanding Take?
Factors That Affect Time
The time it takes to sand your floors depends on factors like:
- Room size: Larger rooms require more time.
- Condition of the floor: Floors with deep scratches or uneven surfaces may take longer to sand.
- Tools used: Professional-grade equipment speeds up the process.
Average Time for Professional vs DIY Sanding
On average, professional floor sanding can be completed in a day or two, depending on the size of the area. DIY sanding, due to less powerful equipment and inexperience, can take much longer and often requires multiple days.
DIY Wood Floor Sanding vs Hiring Professionals
The Risks of DIY Floor Sanding
Equipment Rental Issues
Renting sanding equipment is common for DIYers, but rental machines are often not as powerful as professional tools. This can result in uneven sanding or incomplete removal of old finishes.
Uneven Sanding
Without experience, it's easy to sand unevenly, creating dips and grooves in the floor that will be noticeable even after refinishing. Professionals know how to maintain an even pressure throughout the process.
Advantages of Hiring Professionals
Expertise and Experience
Professional floor sanders have the skills and knowledge to handle various types of wood and conditions, ensuring a flawless finish.
Time and Effort Saved
What might take you days to accomplish can be done by a professional in a fraction of the time, saving you both effort and the hassle of dealing with heavy equipment.
Cost of Wood Floor Sanding
DIY Costs vs Professional Services
DIY sanding may seem cost-effective, but you must consider the costs of equipment rental, sandpaper, and finishing materials. Professional services, while more expensive upfront, often include everything in one package and deliver higher-quality results.
Factors Affecting Pricing
The cost of floor sanding depends on factors like:
- Size of the area.
- Condition of the wood.
- Type of finish applied.
Maintaining Your Wood Floor After Sanding
Routine Cleaning and Care
After sanding and refinishing, maintain your floors by regularly sweeping and using a damp mop. Avoid harsh cleaners that could damage the finish.
When to Reapply Finish
Over time, even well-maintained floors will wear. Reapply finish every few years to keep the wood protected and looking its best.
DIY vs Professional Wood Floor Sanding: Case Study
DIY Case Study: Common Pitfalls and Challenges
In one DIY project, a homeowner rented equipment to sand their floors but ended up with uneven patches due to inconsistent sanding pressure. They also struggled with dust control, which affected the finish.
Professional Service Case Study: Flawless Finish and Time-Saving Results
By contrast, a professional service was hired for another home. The team completed the job in one day, leaving the floors smooth and the finish flawless, with no dust left behind. The homeowner saved time and avoided the frustration of DIY mistakes.
By hiring professional wood floor sanding services, you ensure a smoother, more durable finish that enhances the beauty and longevity of your floors. Ready to restore your wood floors? Contact a professional today for a flawless result!


