
The Basics of Carpet Installation
Carpet installation is a process that requires precision and expertise to achieve a durable and aesthetically pleasing finish. Whether it’s a residential or commercial space, proper installation ensures comfort, insulation, and an enhanced visual appeal.
What is Carpet Installation?
Carpet installation involves preparing the flooring surface, laying down carpet padding, and securely fitting the carpet using tools and techniques that ensure durability.
Why Proper Installation Matters
A poorly installed carpet can wrinkle, wear out prematurely, or pose safety risks. Correct installation enhances the carpet’s longevity and ensures it maintains its appearance over time.
Tools and Materials Needed for Carpet Installation
To achieve a professional finish, you’ll need the right tools and materials.
Essential Tools for the Job
- Carpet cutter and utility knife.
- Knee kicker and power stretcher for tight fits.
- Tack strips and staple gun for securing edges.
- Measuring tape for accuracy.
Types of Materials Required
- Carpet padding to add comfort and durability.
- Adhesive or staples to fix the carpet in place.
- The carpet itself, selected based on style, durability, and room usage.
Preparing the Space for Carpet Installation
Preparation is a critical step to ensure a smooth installation.
Clearing the Area and Removing Old Flooring
All furniture should be removed to create an empty workspace. If replacing old carpet, it must be pulled up carefully, ensuring all adhesive residue and staples are removed.
Assessing and Repairing the Subfloor
A clean, level subfloor is essential for a flawless finish. Any damages like cracks or uneven surfaces should be repaired before proceeding.
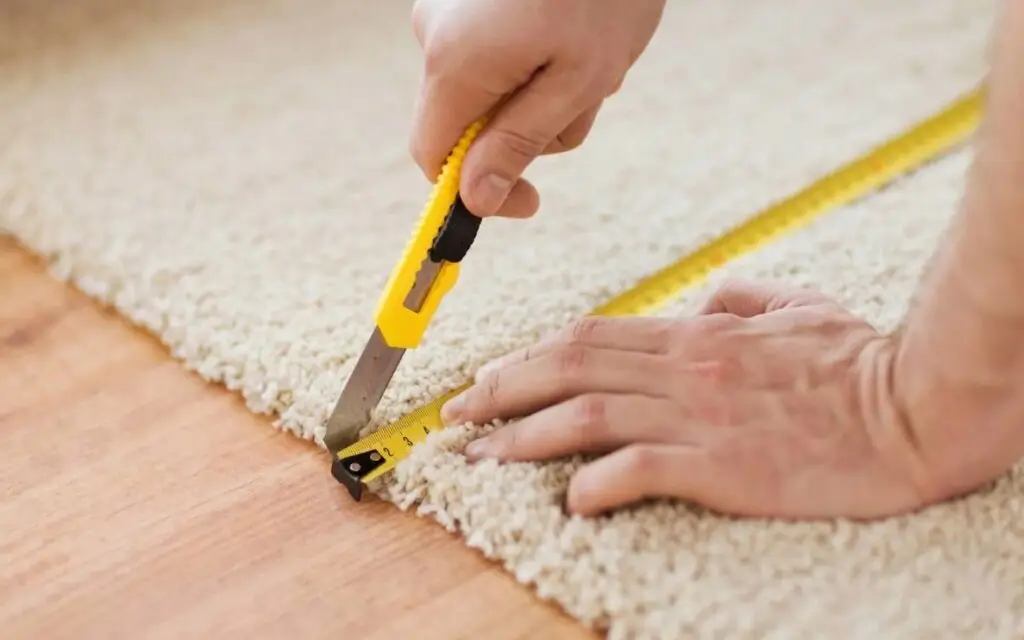
Measuring and Cutting the Carpet
Accuracy in measurements and cutting is vital to avoid waste or improper fits.
How to Measure Accurately
Measure the room’s length and width, adding a few extra inches for trimming. Don’t forget to include alcoves or irregular corners.
Cutting Techniques for Precise Fitting
Roll out the carpet and use a utility knife to cut it according to your measurements, ensuring clean edges for seamless installation.
Installing Carpet Padding
The padding serves as the foundation for the carpet.
The Role of Padding in Comfort and Durability
Padding absorbs impact, reduces wear, and provides a softer underfoot feel. It also acts as an insulator, enhancing energy efficiency.
Tips for Securing Padding Effectively
Lay the padding smoothly, securing it with staples or adhesive, ensuring there are no gaps or overlaps.
Laying the Carpet
Positioning and securing the carpet correctly is crucial for a professional look.
Methods for Positioning the Carpet Correctly
Place the carpet over the padding, leaving excess material at the edges for trimming. Ensure it’s aligned with the room’s layout.
Tack Strips and Adhesive Applications
Attach the carpet to tack strips along the perimeter and use adhesive where necessary, ensuring it stays in place.
Stretching and Securing the Carpet
This step eliminates wrinkles and ensures a tight fit.
How to Use a Carpet Stretcher
A power stretcher is used to pull the carpet taut across the room, securing it firmly onto the tack strips.
Securing Edges and Seams for a Seamless Look
Carefully tuck the edges under baseboards and ensure seams between carpet sections are invisible by using seam tape or adhesives.
Finishing Touches and Cleanup
Once the carpet is installed, a few final steps ensure a polished result.
Trimming Excess Carpet
Trim any leftover material at the edges for a clean finish.
Vacuuming and Inspecting the Final Result
Vacuum the carpet to remove any loose fibers and inspect the installation for any adjustments needed.
DIY Carpet Installation vs Professional Services
Deciding whether to install carpet yourself or hire professionals depends on your expertise and resources.
Advantages of Hiring Professionals
Professionals bring experience, ensuring precision and quality. They handle challenges like complex layouts or seams, often providing warranties for their work.
Risks and Challenges of DIY Projects
DIY installations can lead to uneven seams, improper stretching, or wasted materials. Lack of tools and experience may result in higher long-term costs due to repairs or premature replacement.
By hiring a professional, you save time, ensure quality, and extend the life of your investment.
FAQs & Answers
To successfully install carpet, you’ll need specialized tools, including a carpet cutter, knee kicker, power stretcher, tack strips, and a staple gun. These tools help ensure precision, tight seams, and proper placement. Additional items like a measuring tape, adhesive, and safety equipment (gloves, knee pads) are also essential for a professional-quality result.
While it’s possible to install carpet yourself, it’s a challenging task that requires experience and specialized tools. DIY installation often leads to mistakes like improper stretching or uneven seams, which can reduce the carpet's lifespan. Hiring professionals ensures the job is done efficiently, saving time and reducing the risk of costly errors.
Professional carpet installation costs typically range between $3 and $6 per square foot, depending on factors like room size, carpet type, and location. Additional expenses may include removing old flooring, repairing the subfloor, or custom fitting for unique layouts. Professionals often provide warranties, adding value to their services.
A professionally installed carpet, when combined with quality materials, can last 10-15 years or longer. Lifespan depends on factors like carpet type, foot traffic, and maintenance. Regular cleaning and avoiding excessive wear can significantly extend its durability and appearance.
Carpet stretching ensures a snug and secure fit, preventing wrinkles, ripples, and premature wear. Without proper stretching, the carpet can shift over time, creating safety hazards and reducing its lifespan. Professionals use tools like power stretchers to achieve a tight and seamless finish.
Padding comes in various materials, including foam, rubber, and fiber. Each type offers different levels of comfort, insulation, and durability. The right padding not only enhances comfort but also extends the life of the carpet by reducing wear and tear. Discussing your needs with a professional ensures the best choice for your space.
Yes, preparing the space is crucial. This involves clearing out furniture, removing old flooring, and ensuring the subfloor is clean and level. For extensive repairs or unique challenges, consulting professionals ensures the subfloor is ready to support the new carpet.
The time required depends on the size and complexity of the project. A single room can often be completed within a day, while larger or more intricate spaces might take 2-3 days. Hiring professionals can streamline the process, reducing delays and ensuring precision.
Professional installation ensures a flawless finish, maximizing the carpet's lifespan and visual appeal. Experts have the tools and experience to handle challenges like irregular layouts, seams, or complex designs. Additionally, many offer warranties for peace of mind, making the investment worthwhile.


