
Understanding Vinyl Plank Flooring
What Is Vinyl Plank Flooring?
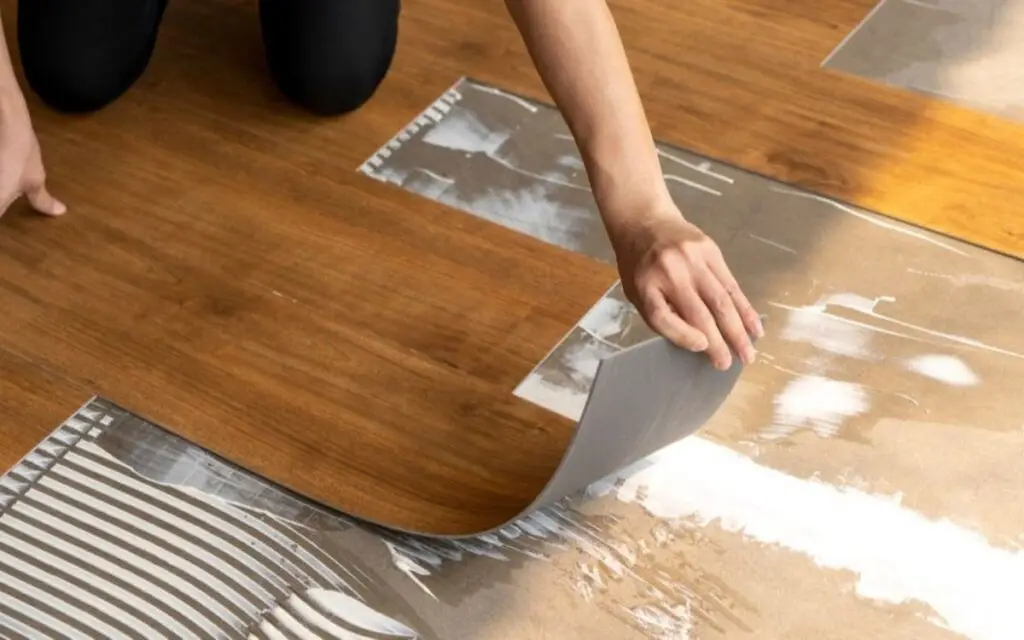
Vinyl plank flooring is a popular choice for homeowners due to its durability, water resistance, and aesthetic appeal. Designed to mimic natural wood or stone, vinyl planks are available in various styles, colors, and textures. This flooring option comes in several types, including floating floors with a click-lock system, adhesive-backed planks, and rigid core varieties.
Why Choose Vinyl Plank Flooring?
Vinyl plank flooring is favored for its resilience and versatility. It withstands heavy traffic and moisture, making it ideal for kitchens, bathrooms, and basements. Its affordability compared to hardwood or tile adds to its appeal, and its quick installation process makes it suitable for DIY enthusiasts.
Can You Install Vinyl Plank Flooring Yourself?
Advantages of DIY Installation
- Cost Savings: Installing vinyl planks yourself can save on labor costs, often a significant portion of the overall expense.
- Personal Satisfaction: Completing a home improvement project on your own can be rewarding and provide a sense of accomplishment.
Challenges to Consider
- Precision Required: Accurate measurements and cuts are essential to ensure a professional finish.
- Time-Consuming: DIY installation may take longer than hiring a professional, particularly for beginners.
Tools and Materials Needed
Essential Tools for Installation
- Utility Knife or Saw: For cutting planks to size.
- Measuring Tape and Straight Edge: To ensure precise measurements.
- Spacers: To maintain expansion gaps.
- Rubber Mallet: To secure planks without damaging them.
Additional Materials
- Underlayment: Necessary for some installations to improve cushioning and soundproofing.
- Adhesive: For glue-down planks.
Preparing for Vinyl Plank Installation
Assessing Your Subfloor
- Clean Surface: Remove dust, debris, and old adhesive to ensure a smooth installation.
- Level Surface: Address uneven areas by sanding or using a leveling compound.
Measuring and Planning
- Calculate Square Footage: Measure your room to determine how much material you’ll need, adding 10% for waste.
- Layout Plan: Arrange planks to minimize seams and ensure a balanced look.
Step-by-Step Guide to DIY Vinyl Plank Installation
Step 1: Gather Tools and Materials
Ensure you have all necessary tools and materials before beginning to avoid delays.
Step 2: Prepare the Room
- Remove baseboards and existing flooring if needed.
- Clean the subfloor thoroughly and ensure it’s level.
Step 3: Lay the First Row
- Align the first row parallel to the longest wall.
- Use spacers to maintain a consistent expansion gap.
Step 4: Connect Planks
- For floating floors, click planks together using their locking mechanism.
- For glue-down planks, apply adhesive as directed and press planks firmly.
Step 5: Cut Planks to Fit
- Measure the gaps at edges or around obstacles.
- Use a utility knife or saw to trim planks to size.
Step 6: Finishing Touches
- Reinstall baseboards to cover expansion gaps.
- Clean the floor to remove dust and debris.
Common Mistakes to Avoid
Incorrect Subfloor Preparation
Failing to clean or level the subfloor can lead to uneven planks and a poor finish. Always inspect and prepare the subfloor thoroughly.
Misaligned Planks
A crooked first row can affect the entire installation. Use a chalk line to ensure straight alignment.
Skipping Expansion Gaps
Without proper gaps, the floor may buckle or shift due to temperature and humidity changes.
Benefits of Hiring Professionals
Precision and Expertise
Professional installers ensure perfect alignment, seamless cuts, and efficient installation, particularly for large or complex spaces.
Time and Effort Savings
Hiring a professional can significantly reduce installation time and eliminate the stress of DIY errors.
Warranty Advantages
Many manufacturers require professional installation to maintain product warranties, offering added peace of mind.
Cost Comparison: DIY vs. Professional Installation
DIY Costs
- Materials: Vinyl planks and optional underlayment.
- Tools: Purchasing or renting tools adds to upfront costs.
- Mistakes: Errors can increase costs due to wasted material or necessary repairs.
Professional Costs
- Labor Fees: Professionals charge based on room size and complexity.
- Long-Term Savings: Ensures a flawless finish, reducing the likelihood of costly repairs or replacements.
Case Studies: DIY vs. Professional Success Stories
Example 1: A Successful DIY Installation
A homeowner installed vinyl planks in a small guest bedroom with minimal obstacles. By taking time to measure and plan, they achieved a professional-looking result and saved money on labor.
Example 2: A Professional’s Expertise
A family hired professionals to install vinyl planks in a high-traffic kitchen and living area. The pros handled uneven subfloors and complex layouts, completing the project efficiently with a flawless finish.
FAQs & Answers
Vinyl plank flooring is considered beginner-friendly due to its simple locking mechanisms and lightweight design. However, beginners must pay attention to details like subfloor preparation, measuring, and cutting to achieve a quality finish.
Some vinyl planks come with built-in underlayment, eliminating the need for an additional layer. However, in certain situations—like uneven subfloors or added soundproofing needs—an extra underlayment can improve performance.
The time required depends on the room size and layout complexity. For a medium-sized room, a beginner might spend 1-2 days, including preparation and installation.
Key tools include a utility knife or saw for cutting planks, measuring tape for accuracy, spacers to maintain gaps, and a rubber mallet to secure planks. Additional tools may be required depending on the type of vinyl flooring.
Hiring a professional is a smart choice for larger or more complicated spaces, or if you’re unsure about handling subfloor issues. Professionals ensure a polished finish and often come with warranties for their work.


