Can You Install Tile Yourself?
So, you’re thinking about installing tile yourself—good for you! Whether you want to revamp your kitchen, bathroom, or another space in your home, tiling can be a fun DIY project if you’re up for the challenge. But before you jump in, let’s explore whether it’s something you can handle on your own or if it might be worth bringing in the pros.
What You’ll Need to Install Tile
Tiling isn’t exactly rocket science, but it does require some planning, patience, and the right tools. Here’s what you’ll need to get started:
- Materials: Tiles (obviously!), grout, tile adhesive, and spacers.
- Tools: You’ll need a tile cutter, trowel, level, and a grout float, among other things. Don’t forget your measuring tape and safety gear!
- Surface Preparation: Before laying any tile, you need a clean, flat surface. This might mean removing old flooring, sanding, or patching up uneven areas.
Steps to Installing Tile
If you’re determined to give DIY tile installation a shot, here’s an overview of the steps you’ll follow.
1. Prepare the Surface
This step is key to ensuring your tile stays in place and looks great for years to come.
- Clean and Level: Make sure your surface is smooth, clean, and completely level. If you’re tiling over a wooden subfloor, you may need to install a cement backer board first.
- Measure and Plan: Plan your layout and measure carefully. Start from the center of the room and work your way out to avoid crooked tiles along the walls.
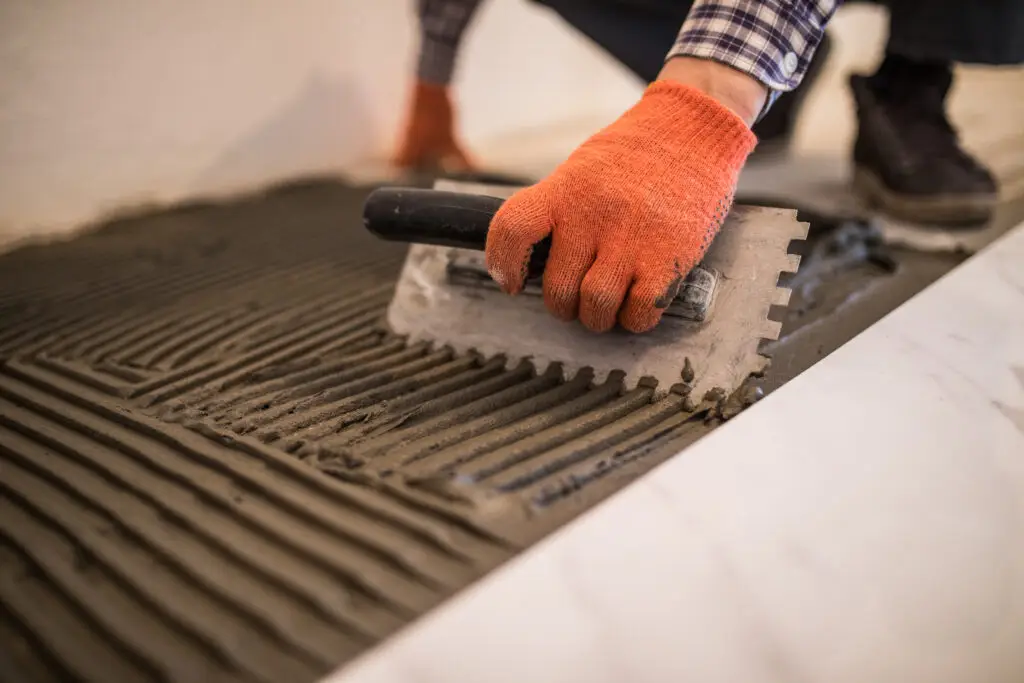
2. Apply Tile Adhesive
This is where the actual tiling begins.
- Spread Adhesive: Use a notched trowel to spread a layer of adhesive (also called thin-set mortar) onto the surface.
- Work in Small Sections: It’s important to work in small areas so the adhesive doesn’t dry before you place the tile.
3. Lay the Tile
Now it’s time to get those tiles down.
- Place Tiles: Set each tile into the adhesive and press firmly. Use spacers to keep consistent gaps between tiles.
- Check for Level: Use a level frequently to make sure your tiles are sitting evenly and aren’t tilting or misaligned.
- Cut as Needed: You’ll likely need to cut some tiles to fit along edges or around fixtures. A tile cutter or wet saw will do the trick.
4. Grout the Tiles
Once your tiles are firmly in place (give them 24 hours to set), it’s time to grout.
- Mix and Apply Grout: Follow the instructions on the grout packaging to mix it. Spread the grout over the tiles using a grout float, pushing it into the gaps.
- Wipe Excess Grout: Use a damp sponge to wipe off any excess grout from the surface of the tiles, being careful not to pull grout out of the gaps.
- Seal the Grout: Once dry, apply a grout sealer to protect it from stains and water damage.
Why DIY Tile Installation Might Not Be Right for Everyone
Now, let’s get real for a second. While DIY tiling can save you money and give you a great sense of accomplishment, it’s not always as easy as it looks on TV. Here are a few reasons you might want to think twice:
Precision is Key
Tile installation requires exact measurements, especially when cutting tiles to fit around corners, doorways, or fixtures. A small miscalculation can throw off the entire look of your project.
It’s a Time-Consuming Process
While a pro could knock out a tiling job in a day or two, a DIYer might need several weekends. If you’re on a tight schedule, that’s something to consider.
Potential for Costly Mistakes
While you can save money on labor by doing it yourself, mistakes can add up quickly. Misaligned tiles, uneven grout lines, or improper adhesive application could lead to cracked tiles, water damage, or just a bad-looking floor.
Physical Labor
Tiling is hard on your knees and back. It involves a lot of bending, kneeling, and lifting heavy materials. If you’re not up for the physical aspect, it might be better to hire a pro.
When to Call a Professional
So, should you install tile yourself? Here’s when you might want to hand the job off to a professional.
Complex Patterns and Designs
If you’re planning an intricate design or working in a room with lots of odd angles or cuts, a pro’s expertise will save you a lot of headaches.
Large or High-Traffic Areas
For larger areas like a kitchen or a heavily used hallway, hiring a pro ensures the job is done quickly and properly. You don’t want to be walking on half-finished floors for weeks.
Budget Considerations
While DIY may seem cheaper, the cost of tools, materials, and potential mistakes can sometimes add up. A professional can get the job done efficiently, without the risk of errors that could cost more to fix later.
Conclusion: Can You Install Tile Yourself?
Yes, you can install tile yourself—if you’ve got the time, patience, and attention to detail! It’s a rewarding project if you’re up for the challenge, but if the thought of spending multiple weekends on your knees with a tile cutter sounds like a nightmare, don’t hesitate to call in the pros. In the end, a professional job could save you time, frustration, and even money in the long run.