
Preparing for Floor Polishing
Assessing the Floor Type
Identifying Material
The first step in any floor polishing procedure is to correctly identify the type of material you will be working with, and will often determine which cleaning solutions, polishing compounds, and techniques will be most effective. Common flooring materials include hardwood, stone, concrete, and tile, and the type of material that you have, will greatly affect the way it is polished.
Determining Condition
You will also want to carefully examine the current condition of the floor, which will allow you to identify any scratches, stains, or other types of damage, that need to be addressed before the polishing can begin. If there are any imperfections, these should be addressed, and corrected, as they will negatively affect the finished product.
Gathering Necessary Tools and Materials
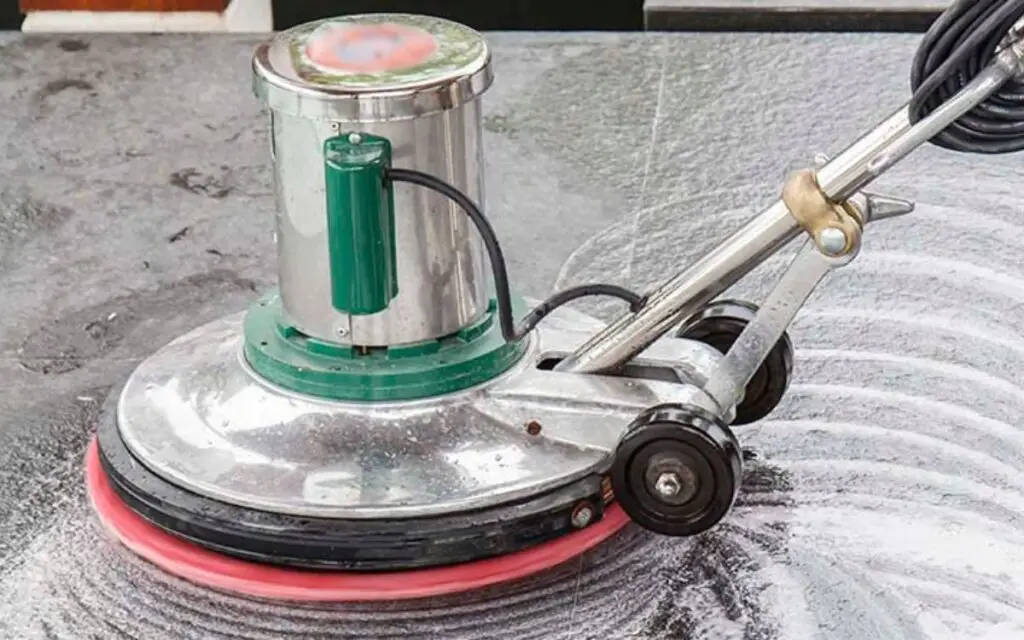
Polishing Machine
A high-quality floor polishing machine is the most important tool, and is essential for achieving a professional-looking result. There are several different types of polishing machines available, including rotary polishers, and orbital polishers, and the specific choice will depend on the type of flooring, and the specific results that you are hoping to achieve.
Polishing Pads
You will also need a variety of polishing pads with different grits, and textures, which will help you to achieve the desired level of shine. It is very important to use the correct types of pads, as using the wrong ones, can actually damage your floors. You will also want to make sure to keep the pads clean, and change them often, to ensure the highest quality results.
Cleaning Solutions
You will also need a variety of cleaning solutions to prepare the floor, and to remove any residue after the polishing is complete. You should always use pH-neutral cleaners that are specifically designed for use on the type of flooring that you have, and you should also follow all of the manufacturer’s instructions carefully.
Sealer
After the polishing is complete, it is very important to apply a sealer, to protect the floor from future damage, and to help maintain the shine. There are many different types of sealers available, and you should always choose one that is specifically designed for your type of flooring. You should also follow all of the manufacturer’s instructions carefully, when applying the sealer, and always be sure to allow plenty of time for the sealer to fully dry.
Safety Gear
It is also essential to wear the proper safety gear throughout the entire polishing process, to protect yourself from any potential hazards. This gear should always include safety glasses, a dust mask, gloves, and hearing protection, and you should always make sure that all of the safety gear fits you properly, and is in good condition.
Step-by-Step Floor Polishing Procedure
Step 1: Cleaning the Floor
Removing Debris
The first step in the floor polishing process is to thoroughly clean the floor, removing any loose debris, dust, and dirt, that may be present. This can be done using a broom, a vacuum cleaner, or a dust mop, and you will want to make sure to clean all of the corners and edges of the room, as well as all of the open areas.
Deep Cleaning
After removing the loose debris, you will then want to deep clean the floor using a pH-neutral cleaner, and a mop or scrub brush. You will want to follow the manufacturer’s instructions carefully, when applying the cleaning solution, and also be sure to rinse the floor thoroughly, to remove any remaining residue.
Step 2: Repairing Any Damage
Filling Cracks
Any cracks, or holes, in the floor, should be filled with a patching compound, before beginning the polishing process. You should also follow the manufacturer’s instructions carefully when applying the patching compound, and allow it to dry completely, before moving on to the next step.
Addressing Scratches
If there are any scratches or scuff marks on the floor, these should be addressed with sandpaper, or a specialized scratch removal product. Be sure to use the correct grit of sandpaper, to avoid damaging the floor, and follow all of the instructions on the scratch removal product, carefully.
Step 3: Sanding (If Applicable)
Choosing the Correct Grit
If sanding is necessary, you will want to carefully choose the correct grit of sandpaper, based on the type of flooring that you have, and the severity of the scratches or imperfections. For most floors, you will want to start with a coarse-grit sandpaper, and then gradually move to finer grits, to achieve a smooth and even surface.
Sanding Techniques
When sanding, it is very important to use even, overlapping strokes, and to avoid applying too much pressure, as this can damage the floor. You will also want to make sure to vacuum up all of the sanding dust, before moving on to the next step. It is recommended to consult with a professional installer, to make sure you are using the correct sanding techniques, for your specific flooring type.
Step 4: Applying Polishing Compound
Selecting the Right Compound
You will also want to carefully select the right polishing compound, based on the type of flooring that you have, and the level of shine that you are hoping to achieve. There are many different types of polishing compounds available, and it is very important to choose one that is specifically designed for your floor.
Application Methods
When applying the polishing compound, you will want to use a clean mop, or applicator pad, and apply a thin, even layer, over the entire surface of the floor. You should also follow the manufacturer’s instructions carefully, when applying the polishing compound, and allow it to dry completely, before moving on to the next step.
Step 5: Polishing the Floor
Using the Polishing Machine
Using the polishing machine, you will want to work in small, overlapping sections, and apply even pressure. It is also important to keep the machine moving, at a slow and steady pace, to avoid any swirl marks, or other imperfections. You may also want to start with a low speed setting, and then gradually increase the speed, as needed, to achieve the desired level of shine.
Polishing Techniques
There are several different polishing techniques, that you can use, depending on the type of flooring that you have, and the level of shine that you are hoping to achieve. Some common techniques include dry polishing, wet polishing, and burnishing. It is always best to consult with a professional installer, to determine which technique is best for your specific needs.
Step 6: Buffing the Floor
Using a Clean Buffing Pad
After you have polished the floor, you will want to buff it with a clean buffing pad, to remove any remaining residue, and to enhance the shine. You should also use a dry, clean buffing pad, and work in small, overlapping sections, to ensure a consistent finish.
Achieving the Desired Shine
You may need to buff the floor several times, to achieve the desired level of shine. It is also important to check the floor frequently, to look for any swirl marks or other imperfections, and to address them as needed. The more time and effort you put into this step, the better the end result will be.
Step 7: Cleaning and Sealing
Removing Residue
After buffing the floor, you will want to thoroughly clean it again, to remove any remaining polishing compound, or buffing residue. It is also very important to use a pH-neutral cleaner, to avoid damaging the floor, and make sure to allow the floor to fully dry before sealing.
Applying Sealer
You should choose a sealer that is specifically designed for your type of flooring, and follow the manufacturer’s instructions carefully. After you have applied the sealer, you will also need to allow it to dry completely, before walking on the floor, and it is also important to follow the manufacturer’s recommendations, for how often the floor will need to be resealed.
Common Mistakes to Avoid
Using the Wrong Products
One of the most common mistakes is using the wrong cleaning or polishing products. Always check the manufacturer’s recommendations and use products specifically designed for your floor type. Avoid harsh chemicals and abrasive cleaners, as they can cause permanent damage.
Applying Too Much Pressure
Applying too much pressure with the polishing machine can lead to swirl marks, uneven finishes, and even damage to the flooring material. Let the machine do the work and use a steady, even hand. Practice on a small, inconspicuous area first to get a feel for the right amount of pressure.
Skipping Steps
Skipping steps, such as proper cleaning or sanding, can compromise the final result. Each step in the floor polishing procedure is essential for achieving a smooth, even, and long-lasting shine. Taking shortcuts will likely result in a less-than-professional finish.
The Importance of Professional Floor Polishing
Expertise and Experience
Proper Technique
Professional floor polishers have the expertise and experience to handle different types of flooring materials and know the proper techniques for each. They understand the nuances of polishing, from selecting the right products to using the appropriate equipment settings.
Safety
Professionals are trained in safety protocols and know how to handle potentially hazardous chemicals and heavy machinery. They’ll take the necessary precautions to protect themselves and your property during the polishing process.
Quality Equipment
Professional Grade Polishers
Professionals use high-quality, commercial-grade polishing machines that are more powerful and effective than what is typically available for rent. These machines are designed to provide a consistent finish and minimize the risk of damage.
Specialized Pads
They also have access to a wide range of specialized polishing pads, each designed for a specific purpose and flooring material. This allows them to customize the polishing process and achieve the best possible results.
Long-Term Benefits
Consistent Results
With professional floor polishing, you can expect a consistent, high-quality finish that will enhance the beauty and value of your home. Professionals have the skills and equipment to achieve a uniform shine across the entire floor.
Protection and Longevity
Professional polishing not only improves the appearance of your floors but also provides added protection and extends their lifespan. The polishing process seals the surface, making it more resistant to scratches, stains, and moisture damage.
DIY vs Professional Floor Polishing
Challenges of DIY Polishing
Potential for Damage
The potential for damaging your floors is one of the biggest challenges of DIY polishing. Without the proper knowledge and equipment, it’s easy to make mistakes that can be costly to repair.
Time and Effort
DIY floor polishing is a time-consuming and labor-intensive task that requires a significant investment of time and effort. It can also be physically demanding, especially for large areas.
Advantages of Professional Polishing
Guaranteed Results
When you hire a professional floor polishing service, you can expect guaranteed results. They will stand behind their work and ensure that you are satisfied with the final product.
Warranty
Many professional floor polishing services offer warranties that protect against defects in materials and workmanship. This provides added peace of mind and ensures that your investment is protected.
Case Studies: Floor Polishing Outcomes
Example of a Properly Polished Floor
A homeowner hired a professional to polish their hardwood floors. The result was a stunning, glossy finish that enhanced the natural beauty of the wood and made the entire home look more elegant. The floors were also well-protected and easy to maintain.
Example of a Poorly Polished Floor
Another homeowner attempted to polish their floors themselves but ended up with swirl marks, an uneven finish, and damage to the wood. They had to hire a professional to correct the mistakes, which cost them more than if they had hired a professional in the first place.
FAQs & Answers
Floor polishing involves using specialized equipment and abrasive compounds to smooth and shine the surface of a floor. Common types of floors that can be polished include hardwood, stone, concrete, and tile. Each type of flooring will have its own specific method for polishing, to ensure the best results. Professional installers have the training and knowledge to be familiar with all of these methods.
The main benefits of polishing floors include enhancing their aesthetic appeal, by creating a glossy and reflective surface, and improving their protection and longevity, by sealing the surface and making it more resistant to scratches and stains. Professional installers know the proper sealing techniques and products to ensure your floors look great, and last a long time.
Essential tools and materials needed for DIY floor polishing include a polishing machine, various polishing pads, cleaning solutions, and safety gear. Depending on whether you rent or buy the equipment, expect to spend anywhere from $200 to $1000 or more. Professional installers, on the other hand, already have all of this equipment, and the cost is factored into the overall project price.
Potential risks and challenges with DIY floor polishing include the potential for damaging the floor with scratches or swirl marks, achieving an uneven finish, and safety concerns related to handling heavy equipment and exposure to dust and fumes. Because of these types of issues, professional installers often recommend that you leave this job for the professionals.
While DIY floor polishing may seem cheaper upfront, the potential for mistakes, the cost of equipment, and the limited lifespan of the results, often make professional floor polishing a more cost-effective option in the long run. Professional installers offer expertise, quality materials, and a guarantee on their work, ensuring a consistent finish, and protection from damage. This level of quality and protection is simply not available with DIY projects.


