Understanding Essential Tile Installation Tools
Why Proper Tools are Crucial
Having the right tools is essential for a successful tile installation, and using the proper equipment will guarantee an efficient, safe, and high-quality result. The right tools also make the process easier and less time-consuming, while also preventing errors, and avoiding damages to the tiles, the substrate, or yourself. Professional tile installers are always equipped with all the necessary tools, which guarantees a high-quality result.
The Four Basic Tools Every Installer Needs
While there are many tools used in tile installation, four basic tools are essential for every project, and those are the tile cutter, the notched trowel, tile spacers, and the level. Having a proper understanding of these tools and their uses is essential for any tile installation project, and professional tile installers are experts in their use, ensuring a flawless result.
Tool #1: The Tile Cutter
Types of Tile Cutters
There are different types of tile cutters available, each with their own unique features and applications. Manual tile cutters are great for smaller projects and precise cuts, electric tile cutters are suitable for larger projects and tough materials, and snap cutters are ideal for quick and easy straight cuts. Each type of cutter has its own unique requirements, and professional installers often have a variety of different cutters for different jobs.
Manual, Electric, and Snap Cutters
Manual tile cutters are operated manually, making them ideal for smaller projects and precise cuts. Electric tile cutters use a rotating blade, allowing for quick and efficient cuts, and are usually used for tougher materials. Snap cutters use a scoring wheel and a breaker bar, making them a great option for quick straight cuts. Professionals will be aware of which type of cutter is best suited for each type of tile and project.
How to Use a Tile Cutter Correctly
Using a tile cutter correctly is key to achieving clean and precise cuts, and this includes scoring the tile properly, and then using the breaker bar or blade to make the cut. You should always use a proper technique, as improper use of a tile cutter can result in chipped edges or broken tiles, which is a waste of money and also time consuming. Professional installers are trained in all of the correct techniques for using a tile cutter, making sure each cut is always clean and perfect.
Scoring and Breaking Techniques
Scoring involves creating a shallow groove on the surface of the tile using the scoring wheel, which will guide the breaking point of the tile. Breaking the tile involves using the breaker bar or blade to snap the tile along the scored line. A professional is well versed in all of these techniques and can guarantee a flawless cut every time.
Tips for Clean and Precise Cuts
For clean and precise cuts, always make sure you are using the right blade for the type of tile you are working with, and also use a steady hand to guide the cutter. Always make sure that the scoring line is consistent, and that you apply even pressure while breaking the tile. Professionals always pay attention to detail when using tile cutters to ensure a flawless cut and perfect results.
Tool #2: The Notched Trowel
Different Notch Sizes and Their Uses
Notched trowels are used to apply mortar to the subfloor, and they come in different notch sizes, which will determine the thickness of the mortar layer. Square-notch trowels are used for applying thick layers of mortar, and are often used for large format tiles, while V-notch and U-notch trowels are ideal for smaller tiles, and for applying thinner mortar layers. Professional installers have a variety of trowels for every type of project.
Square-Notch, V-Notch, and U-Notch Trowels
Square-notch trowels create a thicker bed of mortar and are great for heavier tiles, while V-notch trowels are used for smaller tiles, and U-notch trowels are also used for smaller tiles and for when a moderate amount of mortar is needed. Knowing which trowel to use for your project is important, and professionals always know which tool is best for each type of tile and project.
Applying Mortar with a Notched Trowel
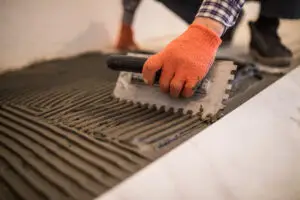
Applying mortar correctly with a notched trowel involves holding the trowel at a specific angle, and applying consistent pressure to create an even layer of mortar. It’s important to use the right amount of mortar to ensure proper adhesion between the tiles and the subfloor. Professional installers are always careful to ensure the mortar application is done perfectly, for a long-lasting and beautiful floor.
Ensuring Even Coverage
Ensuring even mortar coverage involves spreading the mortar evenly across the surface using the notched trowel, making sure that the entire area is covered, and that there are no thin or thick spots. Professional tile installers will always pay attention to detail when spreading the mortar to make sure that it is perfectly even before setting any tiles.
Matching the Trowel to the Tile and Mortar
Matching the right trowel to the tile and mortar is key to creating a strong and long-lasting bond between the tiles and the subfloor. Using the wrong trowel can lead to poor adhesion and potential tile failure. This is another skill that professional installers are well versed in, ensuring that the right trowel is used for every job, guaranteeing a long lasting and beautiful result.
Tool #3: Tile Spacers
The Purpose of Tile Spacers
Tile spacers are used to create consistent grout lines between tiles, and they also ensure that the tiles are properly aligned, resulting in a professional looking installation. They provide a very simple way of maintaining consistent spacing, and they are a key element in any type of tile installation, as they will make sure that the tiles are all installed perfectly. Professional services always use tile spacers for every job, which guarantees a flawless result every time.
Achieving Consistent Grout Lines
Using tile spacers is the most effective way to achieve consistent grout lines, and this guarantees the final result will look both professional and visually pleasing. They also make the job easier by providing a perfect guide for every tile, and they help to speed up the process as well. Professionals always use tile spacers to guarantee a high quality installation.
Types of Tile Spacers
Tile spacers come in various shapes and sizes to accommodate different tile sizes and also different grout line preferences. They come in different shapes such as cross spacers, T-spacers, and also straight line spacers. Choosing the right spacer for your specific project is essential, and professionals will be able to advise on what type of spacer is best for you.
Different Shapes and Sizes
Different shapes and sizes of tile spacers allow for different grout line designs and preferences. Always make sure you are using the correct type of spacers for your specific needs, and you should always consult a professional if you are unsure of what type of spacer you should be using.
Using Tile Spacers Correctly
Using tile spacers correctly involves placing them in between the tiles as you are laying them down, and also making sure you are aligning them perfectly, so that the grout lines are straight. You will also need to make sure you are removing the spacers before the mortar dries, and you will also need to make sure that you clean any residue from the spacers before you reuse them. Professional tile installers always use the correct techniques for using spacers and they will guarantee a clean and perfect grout line.
Ensuring Proper Alignment
Ensuring proper alignment of the spacers will also guarantee that the tiles are all laid down perfectly, resulting in a straight and professional looking result, and this attention to detail is what makes professional installations so amazing. Professionals always take the time to make sure every detail is covered, which guarantees a flawless installation.
Tool #4: The Level
Different Types of Levels
Different types of levels are used in tile installation, and each provides a different level of precision, depending on the complexity of the project. Bubble levels are the most commonly used type of levels, and are very versatile, while laser levels are ideal for larger projects or more complex installations, and they allow for precise leveling across long distances. Professional installers use high quality levels that will guarantee a perfectly level result.
Bubble Levels, Laser Levels, and Spirit Levels
Bubble levels are the most traditional type of levels, and they are easy to use and reliable. Laser levels are more advanced and provide a higher level of precision, as they allow for leveling across large areas, and spirit levels are a smaller and more compact version of bubble levels. Professional installers will always be ready to use the correct level for every job, ensuring that each installation is perfectly level.
How to Use a Level for Tile Installation
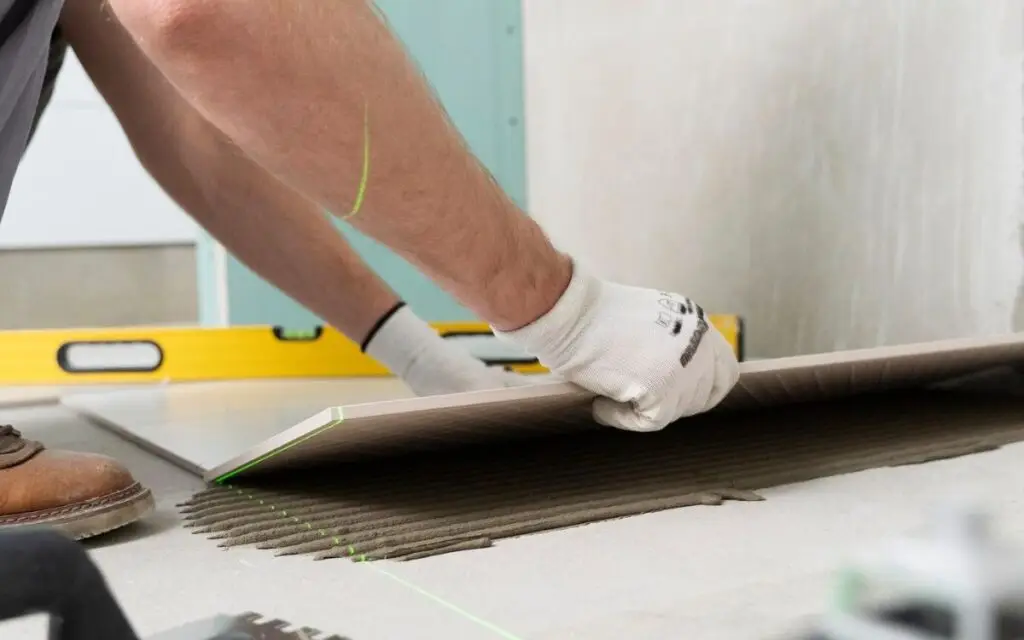
Using a level for tile installation involves placing the level on top of the tiles and making sure the bubble is centered, indicating that the tile is perfectly level. You should check all tiles individually, and also make sure that the entire surface is level. A professional installer is always ready to make sure all tiles are perfectly level, guaranteeing that your floor will look amazing, and also free from any type of issues.
Ensuring a Flat and Even Surface
Ensuring a flat and even surface is crucial for any successful tile installation, and this will also guarantee that all tiles are at the same height, and that there will be no unevenness across the surface. Professionals always ensure that all tiles are perfectly level, as they know that this is vital to the final result.
Maintaining Accuracy and Precision
Maintaining accuracy and precision involves using the level correctly and regularly checking that all tiles are properly aligned. You should always take your time to make sure that all tiles are perfectly level before moving on to the next row. This level of precision is one of the many reasons why professional installations are always the best choice for any tile project.
Professional Tile Installation vs. DIY
Case Study 1: Common DIY Tile Installation Errors
A homeowner decided to install tiles on their own to save money, and they were using improper techniques, such as using the wrong trowel and not using tile spacers. They also did not level the subfloor correctly, resulting in an uneven surface. Eventually, they ended up hiring a professional installer to remove the tiles and redo the entire installation, costing them much more money than if they had hired one from the start.
Case Study 2: The Benefits of Professional Tile Installers
Another homeowner hired a professional installer for their bathroom tile installation. The installer came with all the right tools and they also used the best techniques to ensure that all the tiles were perfectly aligned and level. The result was a beautiful and flawless tile installation that greatly enhanced the look of their bathroom. This case shows how the right tools and techniques make all the difference in the final result.
Why Proper Tools and Techniques are Essential
Proper tools and techniques are essential for ensuring a successful and long-lasting tile installation. Using the right tools correctly will guarantee that all the tiles are installed correctly, safely, and efficiently, while also preventing any future issues from happening, which will save you money and headaches in the long run. Professionals are always careful to use the correct tools and techniques to guarantee the best results for their clients.
Long-Term Cost Savings with Professionals
While DIY might seem like a cheaper solution initially, professional installation will always save you money in the long run. Professionals have the skills, experience, and knowledge to install tiles correctly from the start, and this will help you avoid any costly mistakes, such as uneven surfaces, cracked tiles, loose tiles, or any other issue that can arise from DIY attempts. Professional tile installations are a guaranteed investment that will pay off in the long term.
Maintaining Your Tile Floors
Recommended Cleaning Practices
The recommended cleaning practices for tile floors include regular sweeping or vacuuming to remove all loose debris, and also damp mopping using a pH-neutral cleaning solution that is specifically designed for tile and grout. Always make sure you avoid using harsh chemicals or abrasive cleaners that can damage the surface, and clean up any spills immediately. Professionals will always be able to give you the best advice on how to care for your specific type of tile.
Protecting Your Floors from Damage
Protecting your floors from damage includes using floor protectors under furniture legs, avoiding dragging heavy objects across the surface, and also cleaning up any spills immediately, before they stain the tiles. Professionals will always be ready to offer advice on how to best care for your tiles to ensure a long lasting and beautiful result.
Regular Inspection and Prompt Repairs
Regularly inspecting your tiles for any issues, such as cracks, chips, or loose tiles, and addressing these issues promptly, is essential to prevent any further damages. Minor issues can quickly become major problems if they are ignored, so addressing them early is vital for maintaining the beauty and longevity of your tiles, and professionals can always be there to help you with any repairs you might need.
When to Seek Professional Help
It is always best to seek professional help whenever you are unsure about how to proceed with tile maintenance or repairs, or whenever you encounter major issues that you are unable to address by yourself. Professionals will guarantee a safe and effective solution, and they will also make sure your tiles remain beautiful and long lasting for many years to come.
FAQs & Answers
Tile spacers are crucial for tile installation as they guarantee consistent spacing between tiles, creating a uniform and professional-looking grout line. They will also ensure the tiles are aligned correctly, making the surface look even and seamless. Professional tile installers use tile spacers as a standard part of the process, which guarantees a flawless result and also a long-lasting and beautiful floor.
While you can use different types of levels for tile installation, it's best to use a level that is accurate and easy to read. Bubble levels are the most common type, but laser levels offer even greater accuracy and efficiency for larger projects. Professionals use high-quality levels that are reliable and easy to use, which guarantees a perfectly flat and even surface. Using a good quality level is essential to guarantee a flawless tile installation.
Using the wrong notched trowel will result in incorrect mortar coverage, which will lead to tiles not adhering properly to the subfloor, creating an uneven surface, or leaving gaps where dirt and debris might accumulate. This can lead to tiles becoming loose, cracked or also create safety hazards. Professional tile installers always use the correct trowel size for their projects, guaranteeing that the right amount of mortar is used, and that the tiles will be installed securely and safely.
If you attempt to break tiles manually without a tile cutter, you will run the risk of creating uneven and chipped edges, and you will also be less precise. This will make the installation look unprofessional, and will also cause a lot of wasted material. Professional tile installers always use proper tile cutters to ensure clean and precise cuts, guaranteeing that the installation process is efficient and the result is always perfect, which will save you time and money in the long run.
Hiring a professional tile installer guarantees that all steps in the process will be performed with precision and care. Professionals have all the necessary tools, knowledge, and techniques to make sure the job is done correctly and safely. They also understand the importance of having the right tools and using them properly, which results in a superior and long-lasting result. Professionals will always provide a higher quality installation, while also saving you time, money, and effort.


