Understanding Floor Preparation for Tiling
Before you jump right into laying down those beautiful new tiles, there’s some prep work that needs to be done to ensure they stick and stay in place for the long haul. Prepping your surface properly is key to avoiding tiles that crack, shift, or just don’t look right.
Common Problems with Improper Floor Preparation
- Uneven Surfaces: If the surface isn’t level, your tiles won’t sit flat, leading to uneven edges and possibly cracking over time.
- Moisture Issues: Laying tile directly on a surface prone to moisture can cause the adhesive to fail and tiles to come loose.
- Insufficient Adhesion: If the surface isn’t properly prepared, the tiles might not bond well, leading to loose tiles later on.
- Cracking: A lack of a proper base can cause the floor to shift and crack your tiles, ruining the whole project.
Steps for Prepping the Floor for Tiling
1. Inspection and Assessment
Before you do anything, take a good look at the surface where you plan to tile.
- Visual Inspection: Check for cracks, bumps, or any damage. If the surface isn’t flat, your tiles won’t be either.
- Test for Moisture: Make sure the area is dry. Any moisture issues need to be addressed before tiling to avoid future problems.
2. Preparing the Subfloor
Once you’ve inspected the area, it’s time to get the surface ready for tiling. What you put down before tiling can make or break your project.
- Cleaning the Floor: Sweep and mop the area to remove any dust, dirt, or grease. A clean surface is crucial for proper adhesion.
- Leveling the Floor: If there are any uneven areas, use a self-leveling compound to create a flat surface. This step is essential for ensuring your tiles sit correctly.
3. Choosing the Right Underlayment
The next big step is deciding what to put down under your tiles. This can depend on the type of floor you’re working with.
For Concrete Floors
- Use a Primer: If your concrete is in good shape, apply a primer to improve adhesion.
- Apply a Crack Isolation Membrane: Concrete can crack over time, so adding a crack isolation membrane will help protect your tiles from cracking along with it.
For Wood Floors
- Install Cement Board: Wood floors expand and contract, so laying down cement board provides a stable, moisture-resistant surface for your tiles.
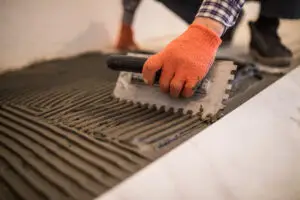
- Thinset and Screws: Apply thinset mortar underneath the cement board and screw it down to secure it firmly to the subfloor.
For Bathroom and Wet Areas
- Use a Waterproof Membrane: In wet areas like bathrooms, applying a waterproof membrane before tiling is critical to prevent water damage.
- Check for Slope: Make sure there’s a slight slope towards the drain, especially if you’re tiling a shower floor.
4. Laying the Underlayment
Once you’ve chosen the right underlayment, it’s time to install it.
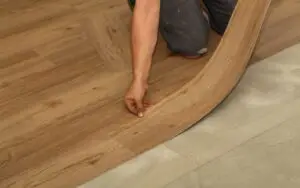
- Roll Out or Lay the Underlayment: For membrane underlayments, roll it out smoothly over the area. For cement boards, cut them to fit and screw them down.
- Seal the Seams: Make sure to seal any seams with mesh tape and thinset to create a continuous, stable surface.
5. Final Preparation
You’re almost ready to start tiling, but don’t forget the final touches!
Ensuring a Clean Surface
- Vacuum or Sweep Again: Any dust left on the surface can interfere with how well the tiles stick, so give it one more thorough clean.
- Dry Run: Lay out your tiles without adhesive to see how they fit and to make sure you’re happy with the placement.
Preventative Maintenance Tips
Once your tiles are installed, you’ll want to make sure they last.
Grout Sealing
- Seal Your Grout: After the grout has cured, seal it to protect it from moisture and staining. Reapply every year for best results.
Routine Cleaning
- Regular Sweeping and Mopping: Keep your tiles clean by sweeping and mopping regularly with a tile-safe cleaner.
- Check for Cracks: Over time, tiles can shift, so keep an eye out for any cracks or issues, and repair them right away.
Professional Maintenance
- Hire a Pro for Repairs: If you notice major issues, like cracked tiles or grout coming loose, don’t hesitate to call a professional to handle the repairs.
- Stay Informed: Keep up with the latest tips and techniques for maintaining tile floors so your investment lasts for years to come.


