
Introduction to the Service
Wood floor repair is the perfect solution when your floors start showing signs of wear and tear. Over time, even the most durable wood floors can suffer from scratches, dents, and water damage. Whether it’s from heavy foot traffic, accidents, or just the passage of time, wood floor repair can restore your floor’s beauty and functionality without the need for a full replacement. In this guide, we’ll walk you through everything you need to know about repairing your wood floors, the benefits of choosing professional repair services, and how you can maintain your floors for years to come.
Comprehensive Service Description
Wood floor repair encompasses a variety of services designed to restore the condition and appearance of hardwood flooring. The main aspects of this service include:
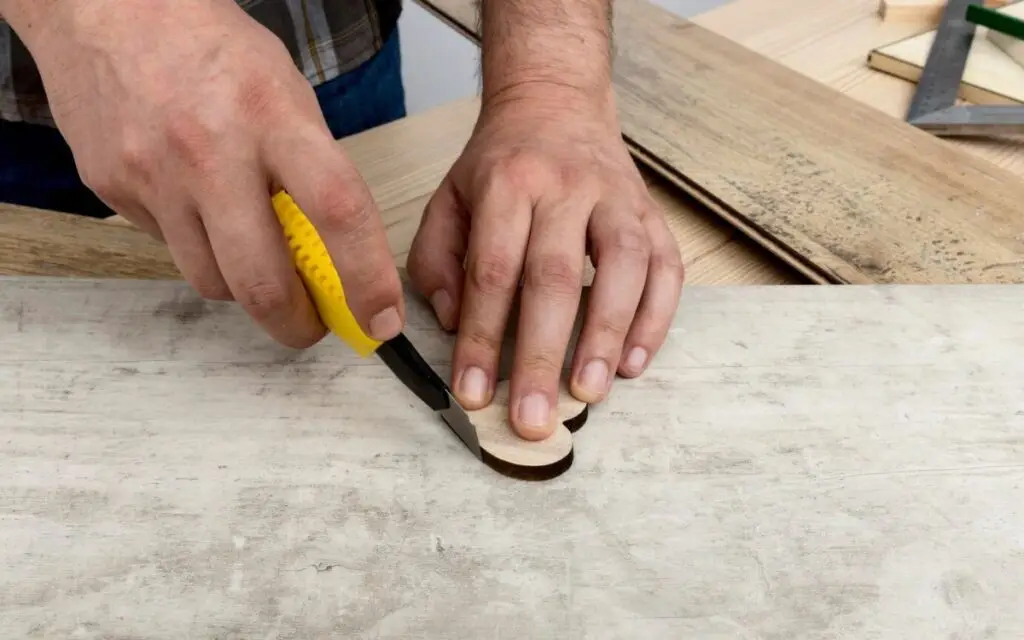
- Assessment & Inspection: The first step is a detailed evaluation of the floor’s condition. Experts will check for cracks, warping, staining, or other damages that need attention.
- Repair Techniques: Depending on the severity of the damage, different methods will be used. For minor scratches, buffing and refinishing might be sufficient. For deeper issues like gouges or water damage, sanding and re-staining may be required.
- Materials & Tools: We use top-quality wood fillers, adhesives, and stain to ensure a seamless finish. Specialized sanding equipment is also used to restore the original shine of your floor without causing further harm.
- Finish & Protection: After repairs, we apply a protective finish to ensure the floor is durable and long-lasting. This finish also enhances the color and texture, making the floor look as good as new.
The unique value of professional wood floor repair lies in the expertise and attention to detail. Professionals use high-grade materials and techniques that DIY methods often lack. You can trust that your floor will not only be repaired, but that it will be restored with care and precision.
Key Benefits for You
1. Increased Durability
- Why it matters: Professional repairs ensure your wood floors will last longer, resisting further damage from daily wear. This means fewer future repairs, saving you money in the long run.
2. Cost-Effectiveness
- Why it matters: Repairing your wood floor is often far less expensive than replacing it entirely. By fixing damage rather than replacing the entire floor, you keep costs low while still achieving a flawless look.
3. Aesthetic Enhancement
- Why it matters: Damaged wood floors can be unsightly and detract from the beauty of your home. Repairs restore the natural elegance of your floors, enhancing the overall aesthetic of your space.
4. Seamless Results
- Why it matters: Professional repairs blend perfectly with the existing floor, ensuring that no one can tell there was ever damage. This gives your floor a fresh, uniform look without compromising its original charm.
5. Protection Against Further Damage
- Why it matters: Our repairs include applying a protective finish that helps prevent future wear, scratches, or stains. This additional layer of protection gives you peace of mind and ensures long-term results.
Step-by-Step Process of the Service
Step 1: Initial Consultation and Inspection
- What to Expect: A professional will visit your home to assess the condition of your wood floors. They’ll inspect areas for wear, moisture damage, or any underlying issues that need attention.
- Timeline: This typically takes about 30 minutes to an hour, depending on the size of the area.
Step 2: Surface Preparation
- What to Expect: We will carefully clean and prepare the floor, removing debris, dirt, and any old finish that could interfere with repairs.
- Timeline: Depending on the extent of the surface area, this step may take 1-2 hours.
Step 3: Repairing the Damage
- What to Expect: This is where the real work happens. For minor damages, we’ll fill in scratches and gouges with wood fillers. For more severe damage, we may need to sand the area or replace individual boards.
- Timeline: This step varies, but it generally takes 2-4 hours depending on the level of damage.
Step 4: Sanding and Refinishing
- What to Expect: After the repairs are made, we’ll sand down the repaired areas to smooth out the surface. Then, we apply a stain or finish that matches the rest of the floor for a uniform look.
- Timeline: Sanding and refinishing may take an additional 3-5 hours, depending on the floor’s size and complexity.
Step 5: Applying the Protective Finish
- What to Expect: Finally, we apply a high-quality protective coat to ensure your floor stays looking great for years. This finish not only enhances the color but also adds a durable layer of protection.
- Timeline: This step usually takes about 1-2 hours for application, with a drying time of several hours.
DIY vs. Professional Job
DIY Methods:
- Common DIY Repairs: Many homeowners try to repair wood floors on their own using wood filler, sandpaper, and finish from a hardware store.
- Challenges: While DIY repairs may seem like a cost-saving solution, they can often lead to uneven finishes, mismatched colors, and the potential for further damage. Without professional-grade tools and expertise, DIY repairs might not be as durable or long-lasting.
Professional Overview:
- Expertise: Professionals bring years of experience and specialized knowledge to the job. They understand how to work with different types of wood, ensuring that repairs are effective and seamlessly integrated with the existing floor.
- Specialized Equipment: Professionals use high-end tools, such as industrial-grade sanders and refinishing products, that deliver superior results compared to DIY methods.
- Quality Assurance: With professionals, you can count on a flawless finish and an overall higher standard of workmanship, ensuring that the repairs stand the test of time.
Helpful Tips for You
Here are some actionable tips to help you make the most of your wood floor repair service and ensure your floors stay looking their best for years:
1. Clear the Area Before Service
- Why it matters: Preparing your space by removing furniture and rugs ensures a smooth repair process. This allows the technicians to access the damaged areas easily, speeding up the repair time and preventing any additional obstacles.
2. Ventilate Your Home During Drying
- Why it matters: After the finish or stain is applied, it’s essential to allow the area to dry properly. Open windows or turn on fans to help the drying process, which also reduces lingering odors.
3. Choose the Right Finish for Your Lifestyle
- Why it matters: Consider your home’s foot traffic and usage when selecting a finish. High-traffic areas benefit from durable, water-resistant finishes, while low-traffic areas might only need a basic protective layer.
4. Regular Cleaning to Maintain the Finish
- Why it matters: After the repair, regular cleaning with a dry mop or a slightly damp cloth can prevent dirt buildup, which can dull the shine and wear down the finish prematurely. Avoid harsh chemicals that can damage the wood.
5. Avoid Heavy Foot Traffic Right After Repair
- Why it matters: Give your wood floors time to set and cure. While the protective finish will dry in hours, it can take up to 72 hours to fully cure, so it’s best to avoid heavy use during this time to prevent marks or dents.
Maintenance and Aftercare
Maintaining your wood floors after repairs is key to ensuring their longevity. Here’s how to keep them in top shape:
1. Regular Dusting and Sweeping
- Why it matters: Dust and dirt can scratch the surface of your wood floors over time, diminishing their appearance. Use a soft broom or microfiber mop to regularly remove dirt and prevent build-up.
2. Use Rugs or Mats in High-Traffic Areas
- Why it matters: Protect high-traffic areas by placing rugs or mats at entryways or in the most-used parts of your home. This will help preserve the integrity of your wood floor by absorbing foot traffic, dirt, and moisture.
3. Avoid Excessive Water Exposure
- Why it matters: Wood is highly susceptible to water damage. Wipe up spills immediately, and avoid mopping your floors with excessive water. Use a damp mop, not a wet one, to prevent warping or staining.
4. Use Felt Pads Under Furniture
- Why it matters: Felt pads under furniture legs prevent scratches and dents from occurring when items are moved around. This simple step will help keep your floors looking pristine.
5. Periodic Professional Inspections
- Why it matters: A professional inspection every few years can identify minor issues before they turn into larger problems. Regular check-ups ensure that your floors stay in top condition and that the finish is still providing adequate protection.
Did You Know?
Did you know that wood floors can increase the value of your home? According to real estate experts, homes with hardwood floors often sell for more and are highly sought after by potential buyers. This means investing in quality wood floor repair can not only improve your living space but can also enhance your property’s resale value!
Pro Tip: Regular maintenance, like applying a protective finish every few years, can help preserve the natural beauty and durability of your floors while boosting their value.
What Our Clients Say
“Our wood floors look brand new again! The repair team was professional, quick, and thorough. I can’t believe how seamless the repairs were. They even matched the stain perfectly! Highly recommend their services.”
– Samantha L., Homeowner
“We had water damage in our living room, and I was sure we would need to replace the entire floor. But after this repair service, you’d never know there was ever a problem. They really know their stuff!”
– James K., Homeowner
Get in Touch
Ready to restore your wood floors? Contact us today to schedule a free estimate and get started on bringing your floors back to life!
We can’t wait to help you restore the beauty and durability of your wood floors!
FAQs & Answers
Wood floor repair typically takes between 4 to 8 hours depending on the extent of the damage, with additional time required for drying and curing.
Yes! Professional repair services can fix minor to moderate water damage, often by replacing damaged planks or sanding down areas affected by moisture.
To prevent damage, use mats in high-traffic areas, avoid direct sunlight on floors, clean up spills immediately, and maintain a consistent humidity level in your home.
Repairing wood floors is usually more cost-effective than replacing them entirely. The cost depends on the severity of the damage, the size of the area, and the materials needed for repair.
Professionals blend repairs seamlessly with the rest of the floor, making it nearly impossible to tell where the damage was. The goal is to restore your floor to its original beauty.
While DIY repairs are possible, they often lack the precision and quality of professional work. If you want long-lasting, seamless results, it’s best to hire experts.
Repairs are typically needed when damage occurs, such as scratches, dents, or water damage. Regular maintenance and care can extend the time between repairs.
Most hardwood floors can be repaired, including oak, maple, walnut, and cherry. Professionals assess the wood type before beginning repairs to ensure compatibility with repair materials.
Yes, cracked or worn-out wood floors can be repaired. Depending on the severity of the damage, cracks can be filled with specialized wood filler, the surface can be sanded to smooth it out, and a finish can be applied to restore its appearance. Professionals know how to handle these issues to ensure the result is almost seamless.


